3D Snowflakes
>> Wednesday, December 15, 2010
This craft has probably rounded the blog block a few times, but I love it and couldn't resist sharing with you all!
I found this tutorial on Attempting to be Domestic last Christmas and thought they were worth a shot. So simple to do and they're really quite lovely- good bang for the (minimal) buck! Not to mention if you store them carefully, you can use them for more than one season- stretching your decorating dollar even more. Mine are now in their second year of use!
Supplies:
-6 square pieces of paper per snowflake. You can use printer paper or do like I did and use scrapbook paper. I found a pretty rice paper on sale at AC Moore- my total cost for the project was $3.
-Scissors
-Tape
-Ruler
-Pencil
1. If your paper is not square, cut into squares- I decided to make 5 inch squares which yielded me 2 squares per sheet, so I used 3 rice paper sheets per snowflake.
2. Next fold your square into a triangle, then fold the triangle in half to form a smaller triangle.
3. Once you have all your folds made, take your ruler and tick off 3 small marks around 1/2 inch apart on the double folded edge of the triangle for making your cuts. I just measured one then used it as a template for all my others.
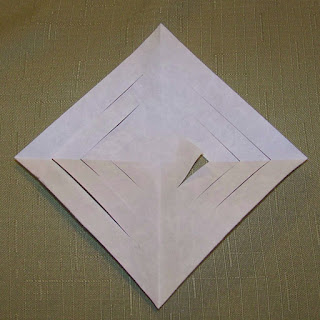
4. Now cut into the triangle (starting at each of your tick marks) towards the single folded side and stop about 1/2 an inch before you reach the edge.
5. Next, unfold your triangle to reveal the square with all it's cuts.
6. Now take the two smallest triangle cuts in the center of the square and fold them in towards each other and secure with tape.
7. Flip your square over, take the next two largest triangle cuts and fold those in towards each other and again, secure with tape.
8. Continue flipping the paper over and folding in each triangle section until it is complete. You need 6 completed sections per snowflake.
9. Now secure the sections together with tape at the inner point and at the "elbow" section of each piece.
10. Do this for each of the 6 sections and your snowflake is completed! I hung mine with some fishing line in my front window. So pretty!


2 comments:
Those are awesome! I am going to try and do this tomorrow or Friday with the kids. I'll let you know if I do.
wow!!! beautiful.
i think i could do these.
thanks for the tutorial!!!
Post a Comment