Showing posts with label recipe. Show all posts

Mmmmmmm, Breakfast for Mama.

>> Sunday, August 7, 2011

I am the only person in this house who will each a poached egg. I am also the only person madly in love with Hollandaise sauce- I know, right?

Because of these simple facts, I have NEVER made either at home and have always saved my indulgences for going out to breakfast. This morning I decided to treat myself and give it a shot. And of course being the blogger that I am, I had to document my experience. :)

I did some recipe hunting, read over the directions really carefully in each one and then took my favorite ingredients from each of the variations and combined them together to create my own version.

Mama's Eggs Benedict Florentine

Ingredients:
2 eggs (for poaching)
1 generous handful of fresh baby spinach
4 baby bella mushrooms, chopped
1/2 tsp minced garlic (1 clove)
salt and pepper

For the Hollandaise:
1 separated egg yolk
1/4 tsp dijon mustard
1/2 tsp fresh chopped parsley (plus more for garnish if you wish)
1/2 tsp fresh lemon juice
1 tsp water
a dash of hot sauce
salt and pepper
1/2 stick melted butter*
*this makes enough Hollandaise to do 4 eggs (serve two people) so it's really not all THAT much butter per person and I never said this was a diet breakfast anyway. :)


The first thing to do is saute the mushrooms, spinach and garlic until the spinach begins to wilt. To do this, heat a small pan to medium, and drizzle with olive oil. When the spinach just begins to soften but is still bright green, remove it from the heat, sprinkle with salt and pepper and set aside; 2-3 minutes. (I move it to a back burner so it was still in a warm area)

Next we're going to poach the eggs.
I've seen this technique on a lot of cooking shows lately -and since the few times in my life (years ago!) that I've actually ever poached eggs was the traditional way in water and vinegar and I've wound up with long, trailing, ugly looking egg white tentacles- I decided I'd give this method a shot. I love it and will never go back!

Heat a pot of water (at least 3 inches of water to cover the eggs) to a boil. While the water is heating, get out some plastic sandwich baggies (the fold over kind, not the zip kind) or a sheet of plastic wrap. Place the baggie down into a small ramekin or bowl and lightly coat with cooking spray. Crack 1 egg into each baggie and then tie securely closed.

Immerse the eggs into the boiling water and cook 3-4 minutes (depending on how runny you like your egg). Once the eggs are done, remove them with a slotted spoon, but keep them in the baggies until you're ready to serve. I set them on a tea towel and covered them over to help keep them warm.
A tip I saw on Brunch @ Bobby's was that in restaurants, they do this to help keep the eggs warm without overcooking the yolk. Then they immerse it back into the water for just a moment to warm it through again before serving. I didn't need to do that last step, because my sauce came together pretty quickly and the eggs were still hot.

Okay, on to our Hollandaise Sauce. This was probably the thing I was most nervous about. But I just made sure to focus on what I was doing and be very very disciplined about each step. The result was a smooth and decadent sauce that held together beautifully. I am so proud!

In a clean, dry glass or stainless steel bowl, combine your egg yolk, mustard, water, lemon juice, parsley and hot sauce. DO NOT add any butter.
Create a double boiler by filling a pot smaller than your bowl with water and get the water to simmering. Be sure your mixing bowl doesn't touch the water below. Whisk the yolk mixture consistantly until it begins to look creamy and pale yellow in color; about 4 minutes.

Remove the yolk mix from the heat and SLOWLY, repeat SLOWLY begin to add your melted butter to it. Like not more than a teaspoon at a time, whisking constantly. If you add too much butter too fast, you're sauce will "break" which means you'll wind up with a yolk mixture sitting seperate in the bowl from an oily buttery looking mixture. The two won't emulsify and you'll have to start over.

As you add the butter, you'll note the sauce taking on a bit more vibrancy in color and a glossy shine, as well as thickening up a bit- but not becoming dense or clumpy looking. Salt and pepper to taste.
Don't rush this process and you should be rewarded with the awesomeness that is Hollandaise Sauce.


Finally, assemble everything atop some toast or english muffin (I only had wheat bread on hand) and dig in!

Read more...

Grilled Pizza. Yummy.

>> Tuesday, August 2, 2011

I have been making this all summer long. It couldn't be easier (or more economical) Obviously you can change this up any way you like to suit your family's tastes. You can also make your own dough if you're so inspired. Typically I'm not so inspired. Read: Lazy.

Anyway, here we go!
Ingredients:

store bought whole wheat pizza dough (1 lb size)
flour for dusting
olive oil
2-3 whole heads of garlic
fresh mozzarella (1/2 lb)
grated cheddar cheese, about 1 cup
fresh tomatoes, sliced
fresh basil*
salt and pepper


I've always had trouble with the premade doughs- getting them to rise properly and then getting them to stretch large enough to make a pizza. I'd roll them out and they'd snap right back like an elastic band and I'd wind up with some thick dough frisbee type thing, not a thin cripsy pizza crust. After much messing and many so-so pizzas, I think I've finally discovered a method that works for me (so far) every time.

Place the dough in a small bowl and drizzle it with a little olive oil to prevent sticking and crusting. Cover the bowl with a damp tea towel or cloth napkin.

Set it on the counter at room temp for about an hour.

If you're following my recipe for the pizza toppings, while your dough is rising, preheat your oven to 450 and prep your garlic. Slice the tops off your garlic heads, drizzle them with olive oil and sprinkle with salt and pepper. Wrap them tightly in foil and roast in the preheated oven for 45 minutes.
Once the dough has had it's hour to rise, remove the towel and literally punch the dough down to remove the air. Recover it and let it sit another 30 minutes or so.

While the dough is in those last 30 minutes of resting, I prep my other ingredients (shred my cheese, slice my veggies, etc). The garlic should be out of the oven by now and cool enough to handle. Squeeze the cloves out of their skins (should come right out) and into a bowl.
Drizzle with about a tbsp of olive oil (+/-) and sprinkle with a touch more salt and pepper. Mash up the cloves with a fork until you have a nice garlic paste to spread on your dough. (I am making a sauceless pizza)
Preheat your grill to high. Clean the grates well and then using a basting brush or a clean kitchen rag lightly brush over the grates with olive oil.

Rolling out your dough: For ease in transfer, I roll out my dough on a large cutting board that I can carry right out to the grill.
Dust the board with a pinch of flour and also dust your rolling pin. Roll the dough out in several directions, adding additional small pinches of flour as needed to prevent sticking. I also periodically flip the dough over while rolling to help keep the circular shape. They don't have to be perfect, they just need to be basically round enough to resemble pizza and thin enough so you don't end up with a dense, bready mass instead of a nice crust.

Carefully transfer the dough to the grill (If you're making a large pizza, I find the assistance of two big spatulas helpful for getting the dough off the cutting board and onto my grill) An alternate option is to cut the dough into smaller portions and make mini pizzas- much easier to move the dough around.
Allow the dough to cook for about 1-2 minutes, then flip and give it another 1-2 minutes. You may get some giant air pockets during this process. Just puncture them with the corner of your spatula and you're good to go!
Remove the dough from the grill and bring it back inside for topping- this is a lot of fun for the kids- When I have patience, I make the mini pizzas and let them pick out their own toppings and arrange them however they'd like. Today I am tired and hungry after a long day at the beach (I know poor me, right?) and so I opted to just make two large pizzas with basic ingredients that everyone in my house likes.

Use a spoon to scoop and spread your garlic paste across your grilled dough. Top your pizza(s) with the rest of your ingredients and then return to the grill to melt the cheese.
I turn the grill to low, sometimes I even turn it off depending on how hot it's gotten. Usually it takes about 6-8 minutes for everything to get gooey and delicious looking. Or maybe I'm just really hungry, so I pull it off when I can't wait any longer!
*Note: don't top the pizza with fresh basil before cooking. It will turn dark and slimy (although still taste fine). Instead, snip or tear it into small pieces and sprinkle it over the pizza as you bring it to the table. The smell is divine!

Read more...

O.M.G. Yum.

>> Sunday, July 31, 2011

I was reading the awesome blog The Victory Garden yarn & curiousities when I saw her post about Tomato Pie.

WOW. It sounded delicious.

image courtesy of Victory Garden Yarn & Curiousities


It looked even better. So I followed her link to the recipe at Country Living.

And then I made it. Actually I made two of them.
With tomatoes and basil all fresh picked from my garden.
Tomatoe-y, cheesy, gooey goodness. I am in love.

Read more...

Simple Summery Salad Using Garden Veggies and Herbs... and Pyrex!

>> Saturday, July 23, 2011

I threw this salad together in just a few minutes and because all the veggies were fresh picked from my garden, the cost was super low!


The great thing about a salad like this is you can make it your own by using whatever you have on hand or whatever vegetables and herbs you prefer.

For today's salad I used: (most of these measurements are rough approximations)

1 (5.8 oz) box of 5 minutes Couscous, cooked according to package directions and cooled
1 green bell pepper, diced
1 medium zucchini, cubed
1 medium yellow squash, cubed
2 ribs celery, diced
1/2 red onion, diced
10-15 yellow and red cherry tomatoes, halved
1 (6 oz.) package crumbled feta cheese
10-12 leaves fresh basil
4-5 fresh mint leaves
1 handful of fresh flat leaf parsley
extra virgin olive oil*
lemon juice*
2-3 dashes hot sauce (to taste)


Basically, I added the couscous and the vegetable ingredients into a bowl, finely chopped all the herbs and then added those to the bowl as well. Next I dressed the salad with the lemon juice, olive oil and hot sauce and last I added the feta and tossed everything together.

Serve immediately or chill it in the fridge for 30 minutes or more. This is even better the next day when the flavors have had time to combine.

Of course serving it in pretty vintage Pyrex is always a nice touch too. :)

*I did not measure the oil or the lemon juice, I just drizzled it in slowly and stirred until everything was well coated/to taste.


Usually I like to add in some nice Kalamata olives, today I completely forgot to pick them up when I popped to the market for the feta cheese. some other tasty ingredients I've added to this salad in the past are: red bell peppers, chick peas, cucumbers and fresh (raw) green beans

Read more...

White Bean and Chicken Chili

>> Thursday, June 9, 2011

I'm trying to stretch the food that I have left in the house until payday (grocery day) on Friday. With that in mind, I took a package of chicken breasts out of the freezer and began to contemplate what to do with them.

After rummaging in my pantry, I decided I'd concoct a "white" chili of sorts. It's a little bit Mexican and definitely belly filling. Enjoy!

Ingredients:

2-3 large boneless skinless chicken breasts, cut into large chunks
(2) 15 oz cans white kidney (cannellini) beans, drained and rinsed
2 large Vidalia Onions, chopped
4-5 large cloves of garlic
3-3.5 cups chicken stock
2 limes, juiced
1 TBSP Olive Oil
1 stick unsalted butter
(1) 8 oz bar sharp cheddar cheese, shredded
1/2 c sour cream
1/3 c AP Flour
Spices and Seasonings: (To taste. The amounts I used are a rough estimate based on my family's likes)

1 TBSP Chili Powder
1 TBSP Cumin
4-5 dashes Hot Sauce (like Tabasco)
Salt
Black Pepper
1/4 cup Fresh Cilantro, chopped finely

Directions:
Preheat your oven to 350 degrees. On a cookie sheet lined with foil (for easy clean up) place your Poblano pepper and garlic cloves. Roast in the oven for about 30 minutes.

While your pepper and garlic are roasting, drizzle about 1 TBSP of Olive Oil and add 1 TBSP of butter to a 6 qt pot and heat on medium.

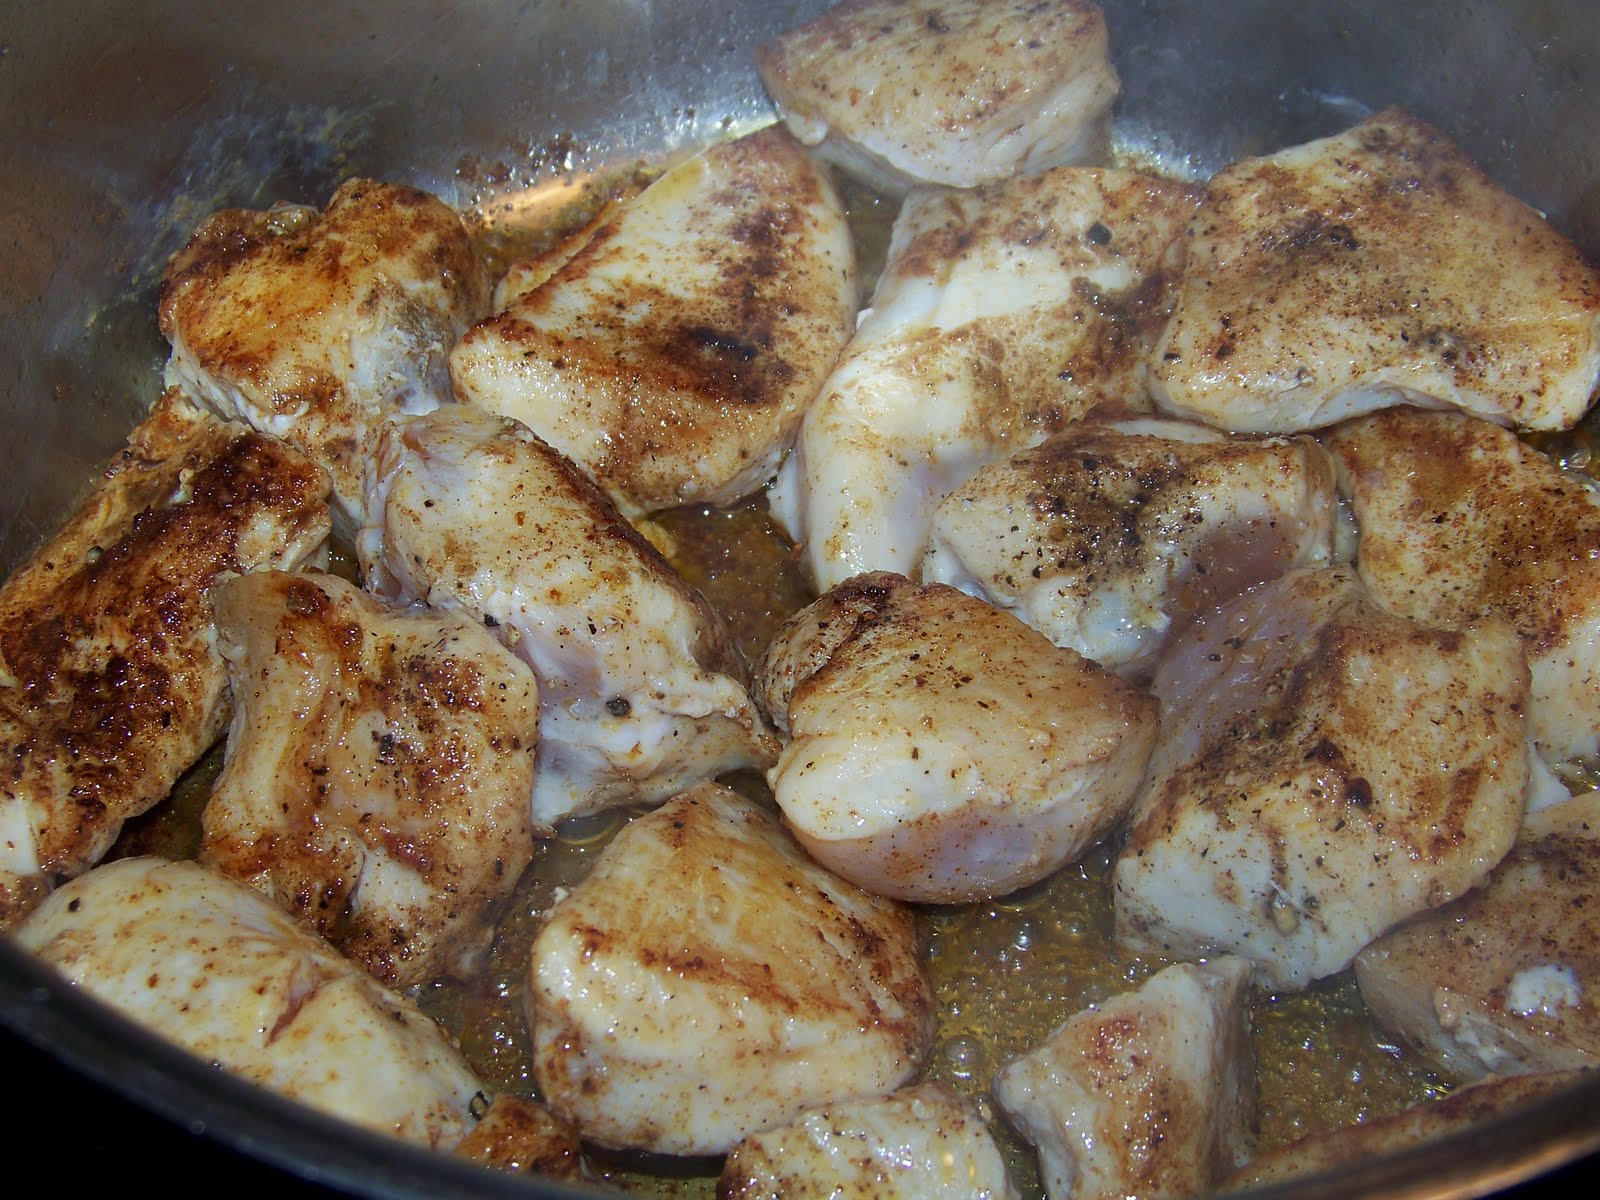
Season your chicken pieces well with some of the chili powder, cumin, salt and pepper then place it in your pot.

Cook until nicely browned on all sides, about 6-8 minutes. Remove the chicken and set aside to cool.
Next, add another 2 TBSP of butter directly into the pot you just cooked the chicken in and once it's melted, add the onions. Cook until they are soft and begin to caramelize slightly, about 5 minutes.
Add the remaining butter into the pot with the onions and when it is melted, sprinkle in the flour to create a roux. Whisk the butter/flour/onion combination constantly for 2-3 minutes then add the chicken stock and lime juice, continuing to stir. It should create a thick, bubbly base for your chili.

Once the base is ready, slide it off the burner while you get your pepper and garlic from the oven. While the veggies cool, use your hands and shred up the now cooled chicken into bite size pieces.
When the pepper is cool enough to handle, gently peel off the skin and discard.
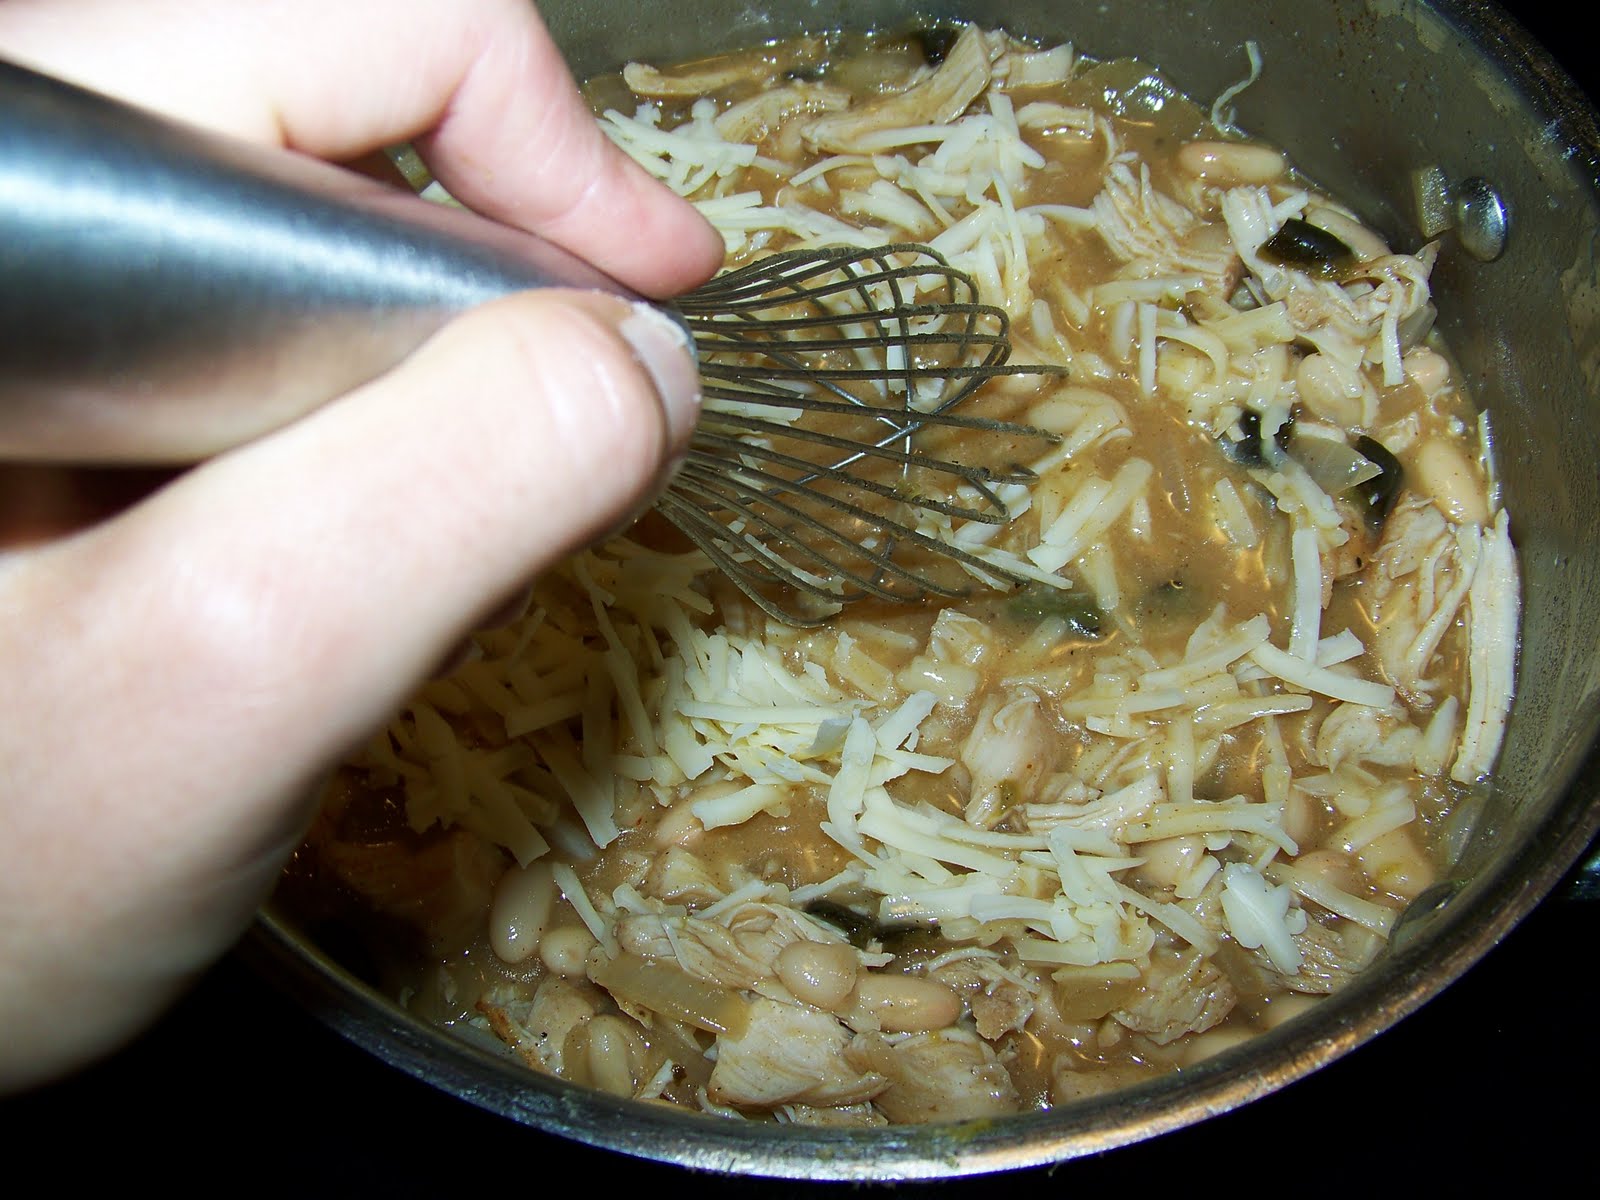
Chop the pepper, removing seeds and stem and add it to your chili base. Next, squeeze the garlic cloves out of their skins directly into the pot. Add the hot sauce, remaining chili powder, cumin, salt and pepper. Whisk all the ingredients together.
Next add the chicken and beans to the pot and then the shredded cheese. Whisk gently until the cheese is melted and fully incorporated.

Simmer over low heat for 20-30 minutes, stirring occasionally.

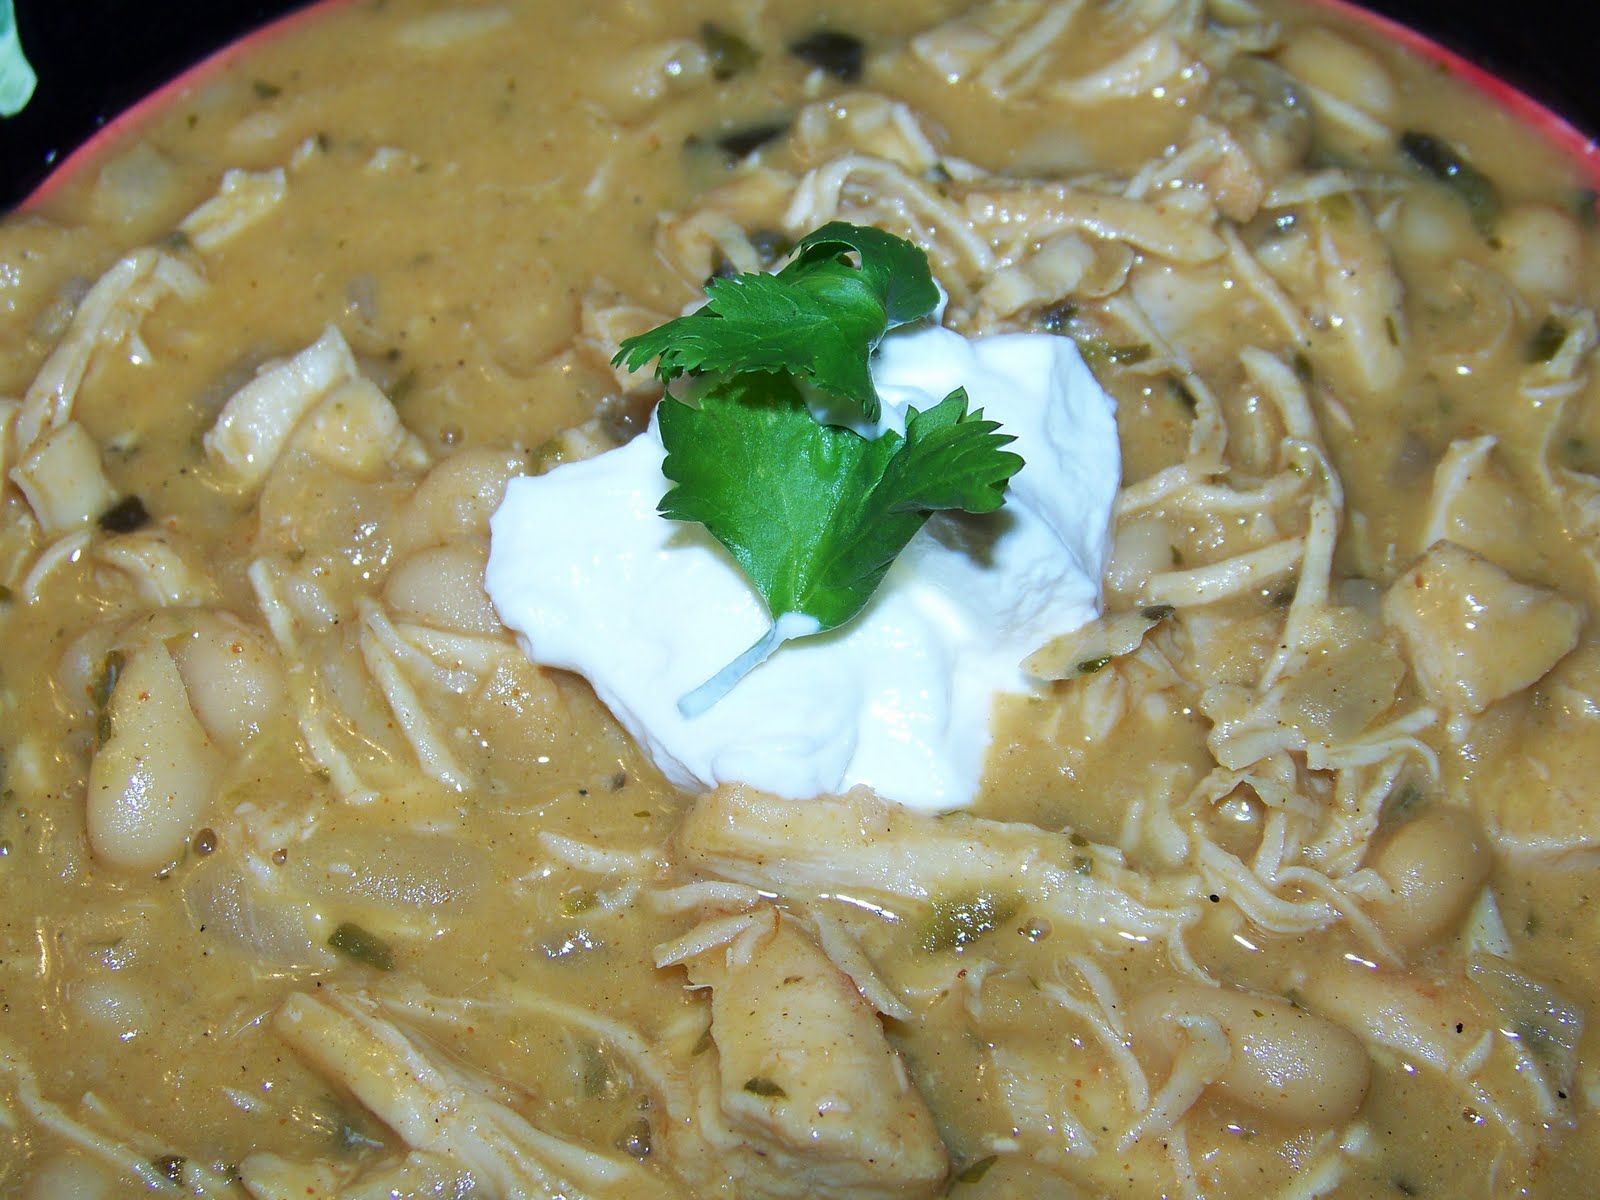
Remove from heat and cool slightly, which will allow the chili to thicken up a bit more. Whisk in the sour cream and cilantro, serve with tortilla chips.
Linking up to

Read more...

Healthier Chicken Cutlets with Linguine and Alfredo Sauce

>> Thursday, March 31, 2011

Key word "healthier". This recipe still uses some ingredients that many will consider no-no's on a diet, but compared to the real deal, high cal, high fat version you might get at a restaurant, this one is bound to be better for you- just based on the fact that it is made at home, so you know what is going into it.

Ingredients:

1 cup homemade breadcrumbs (recipe to follow)
zest of 1 lemon
1 cup grated Parmesan cheese
2 TBSP Neufchatel* cheese
1 TBSP unsalted butter
3 TBSP fresh chopped parsley
1 garlic clove, minced
2 cups 1% or skim milk
2 TBSP AP flour
1/2 cup whole wheat flour
1/2 cup egg whites
4 thin chicken cutlets
1/2 cup whole grape tomatoes (or cherry tomatoes halved)
salt and pepper to taste
1 box whole wheat linguine or pasta of your choice

Directions for the Chicken Cutlets:

1. In 3 seperate dishes, place your whole wheat flour, egg whites and bread crumbs. Season the flour with salt and pepper. Add about half the lemon zest to the bread crumbs as well as 1/4 of a cup of the Parmesan cheese and 1 TBSP of the parsley.
2. Heat some olive oil (enough to coat the bottom of the pan) over medium heat and then dredge the cutlets through the flour, wash in the egg whites and then bread each side. Cook in the pan for about 3-4 minutes per side. (These are fast cooking because they're so thin).
3. Transfer to a plate and put them into a warm oven while you finish making the pasta and sauce.
Directions for the Alfredo Sauce:

This goes really fast, so sorry there are no "in process" photos.

1. In a medium sauce pan melt your butter then add the garlic and remainder of the lemon zest. Cook over medium heat for about 1 minute- until garlic just begins to brown.

2. Add the AP flour and stir until it is all combined and golden brown in color.

3. Whisk in the milk and stir continuously until it thickens- about two minutes.

4. Melt in the Neufchatel and remaining Parmesan cheeses, stirring until smooth. Add salt and pepper to taste.
Follow package directions for cooking your pasta, drain and reserve about 1/4 cup of the starchy liquid.

Combine the pasta, alfredo sauce, grape tomatoes and remaining parsley in a large bowl. If the sauce starts to bind up as it cools, stir in the cooking liquid from the pasta and it will thin it back out again.
Remove your chicken cutlets from the oven and serve immediately.
*Neufchatel cheese is virtually identical to cream cheese in appearance and flavor. In fact, it is shelved right next to the cream cheese at the store and the packaging even looks the same. The difference is it's lower in fat and calories, making it a better alternative.

Homemade Bread Crumbs: This is really simple to do, I haven't purchased breadcrumbs at the store for more than a year, now that I figured this little gem out!

1. Save all the heel ends of your loaves of bread (I also save the crusts because I have one finicky child who wont eat it!) We use Fiber One brand bread, so I know that right there- my bread crumbs will have more fiber in them than normal store bought crumbs! Store your bread in a zip top bag in the freezer.

2. When you're ready to make your meal, simply pull out the desired amount of bread and pop it into either a mini chopper or blender.

3. To season, I use 1-2 TBSP of dried Italian seasoning, tossed right into the chopper with the bread. Pulse to a fine consistency.

Read more...

Cranberry Cinnamon Bran Muffins

>> Sunday, March 6, 2011

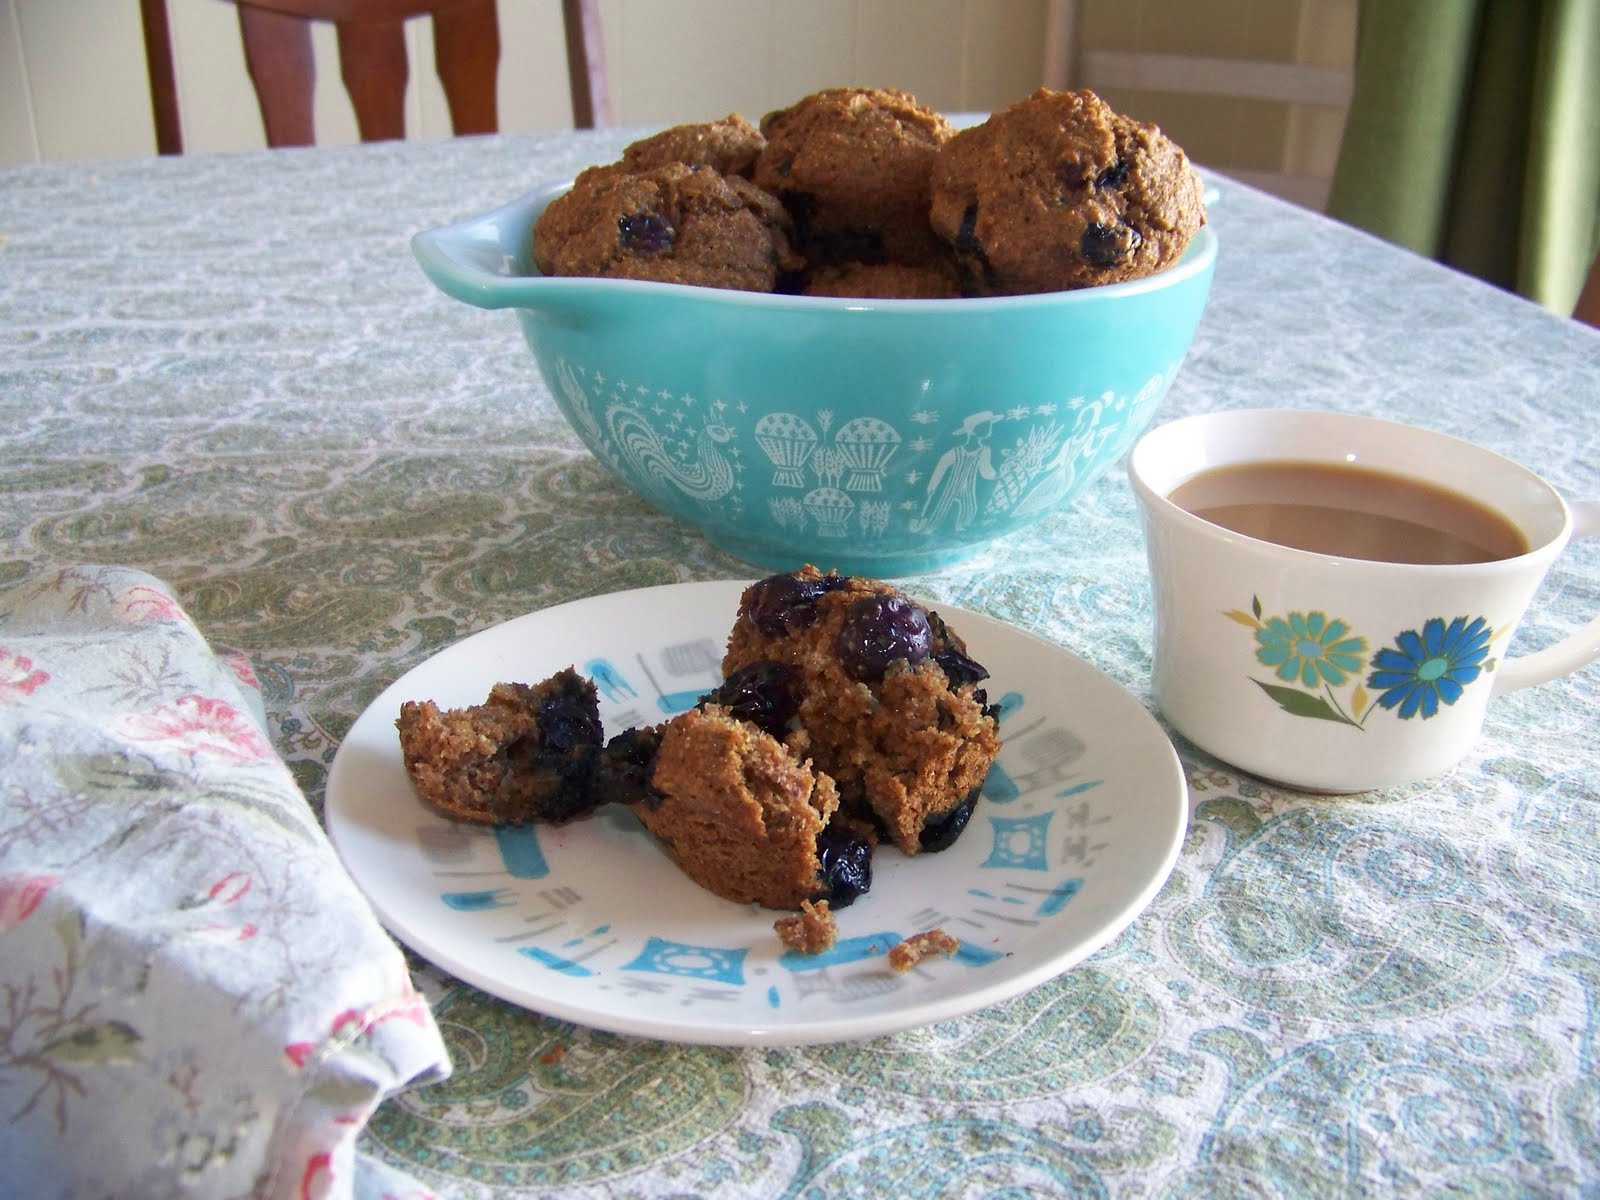
I received this yummy recipe from Val over at Vonlipi's Favorites after seeing her bake them using some of her lovely vintage Pyrex.

They're perfect for someone like me- on a high fiber, healthy carb diet.

Before I give the recipe, though, I'll just let you know I had no cranberries in the house, lol. So I used fresh blueberries instead. They still came out wonderful and I can't wait to try them next time with the cranberries! My adorable assistant is Avery, who was home from school, sick, last week with double ear infections. (He's feeling 100% now!)

Ingredients:

1 cup wheat bran
1/2 cup All-Bran or 100% bran cereal
1/4 tsp salt
1/2 cup boiling water
1 cup skim milk
1 cup dried cranberries
1/3 cup Splenda
1 omega-3 egg
1/4 cup canola oil
1 1/4 cups whole wheat flour
1 1/4 tsp baking soda
1 tsp ground cinnamon

1. Preheat oven to 375 F. Line a 12 cup muffin tin with paper or foil liners.
2. In bowl, combine bran, cereal and salt. Pour boiling water over and stir to combine. Stir in milk and cranberries and set aside.**
**Note: if using fresh berries instead of dried, do not add them in this step.
3. In another bowl, whisk together Splenda, egg and oil. Stir into bran mixture.
4. In a large bowl, stir together baking soda, flour and cinnamon.
Pour bran mixture over flour mixture and stir until just combined.
(This is the time to add fresh berries if you are using them)
5. Divide batter among muffin cups.
Bake for about 20 minutes or until tester inserted in center of muffin comes out clean.
Makes 12 muffins.

Read more...

Nigella Lawson Makes One Pan Sage and Onion Chicken and Sausage

>> Thursday, February 24, 2011

Phew, how's that for a long recipe title?!

I know I promised to post this yesterday, but technically I am typing this while it is yesterday, I'm just scheduling it to post today. ;)

Over the weekend I came across Nigella Lawson on the new Cooking Channel.

She's one of my favorites because I can tell she really loves (and eats!) what she cooks. She's curvy, she snacks on things while she's making them and she sneaks leftovers from the fridge at the end of the night!

If you've never watched her on TV or read a cookbook, I strongly suggest you check her out.

This past weekend she was making a chicken and sausage dish that she said is a staple in her house. (And after I made it, I can understand why. It's SO tasty!)

Without further ado, I bring you Nigella's

One Pan Sage and Onion Chicken and Sausage

Ingredients:

1 large onion or 2 small onions
1/2 cup olive oil (she specifies NOT Extra Virgin, but it's all I had and I think it came out fine)
2 teaspoons English mustard (I didn't have this so I used spicy brown)
1 tablespoon dried sage
Freshly ground black pepper
1 tablespoon Worcestershire sauce
1 lemon

1 (4-pound) chicken, jointed into 10 pieces (I bought bone-in, skin-on chicken pieces on sale- total for 4 pounds cost me $3)
12 sausages (I had sweet Italian- which is the sort she used on the show, but you could health it up slightly by using turkey or chicken sausage here)
2 tablespoons fresh sage leaves, chopped (I omitted this as well, on the show she said if you didn't have them, don't worry about it)

Directions:
Peel and cut the onion into eighths, and put into a freezer bag with the oil, mustard, dried sage, a good grinding of pepper, and Worcestershire sauce. Cut lemon in half, squeeze juice into bag, and then cut the halves into eighths and add them. Squidge everything around to mix -Can I just interrupt to tell you how fun it is to read someone who writes their recipes they way they talk? Squidging is exactly the right word to describe what I did- (the mustard needs help to combine) and then add the chicken pieces. Leave to marinade in the refrigerator overnight, or for up to 2 days. (I did overnight, I can only imagine how heavenly with flavor 2 days would be!)


Preheat the oven to 425 degrees F. Allow the chicken to come to room temperature in its marinade.

Arrange the chicken pieces in a roasting tin skin side up with the marinade, including all the bits and pieces, and tuck the sausages around them.

Sprinkle the fresh sage leaves over the chicken and sausages and then put the tin into the oven to cook for 1 hour and 15 minutes. Turn the sausages over half way through to color them evenly.

Arrange the chicken and sausages on a large platter to serve.
And I repeat. SO GOOD!

I served ours with some simple oven roasted potatoes (also a recipe from Nigella found here and some simple steamed veg)
My next food adventure involves how to slightly healthify (is that a word?) a packaged carrot cake mix to include more fiber and protein so I can justify eating a cupcake. Happy Cooking!


Linking up to Fun with Food Friday at Paisley Passions!

Read more...

Blog template by simplyfabulousbloggertemplates.com

Back to TOP