Showing posts with label before and after. Show all posts

Happy Birthday Aidan A Before and After and Giveaway Reminder!

>> Thursday, October 21, 2010

Whew! Tons of stuff to talk about- it's been a busy two weeks! So sorry to leave you all hanging with no new posts, bad blogger!

First, a very happy birthday to my big boy, Aidan, who turns 7 today! We had his Super Mario Brothers themed party on Sunday and he had a blast! Here are some of the highlights


Today is his actual birthday so I left him a good morning message he couldn't miss!

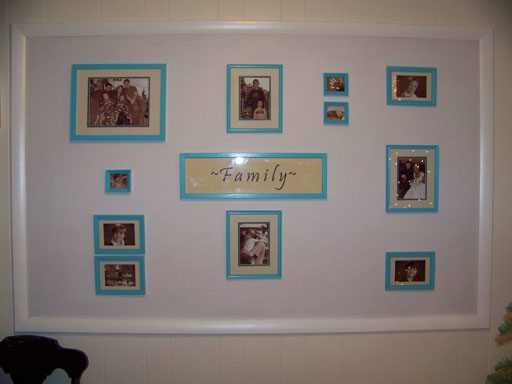
A little side story first... Maybe you remember before, I had this really odd really odd wall thing in my dining room. Waaaaay back when, it used to be a window. And then the previous owners covered it up when they built on the garage addition. But they didn't just drywall it. For some reason, they left the window surround and the wife painted this tree thing in the middle of it.

My quick fix was to paint it white and fill it with photos
A year of that was enough for me, and I decided I needed a change. I bought a pot of chalkboard paint and got to work. We now have this giant chalkboard the kids can color on and practice writing and math- two things they love to do!

What do you think?

And finally, don't forget to enter to win this beautiful glass ornament- today is the last day!

Read more...

Bathrooms and Buckets. A Quick Before and After.

>> Sunday, July 18, 2010

Well, sorta. Not a whole bathroom before and after, but definitely a bucket makeover- and done for free!

1 old vintage tin bucket

A homemade stencil

Trace it out with a pencil

Craft paint and brushes

Fill it in with a steady hand

Viola- a spiffy new bathroom stuff holder (that's such a catchy name, I think I'll trademark it)!


(this would also make an adorable planter pot out on the front steps!)

Linking up to Vintage Thingies Thursday with our hostess Suzanne, The Colorado Lady

Read more...

Before and After- my little living room end table

>> Friday, January 29, 2010


I mentioned in a previous post that I found a table in the clearance section of the store marked down from $100 to $36 because there was some red paint on it and also some damage around one of the knobs.

I used a little wood filler to fix the crushed area around the knob

Gave a light sanding to knock down the shine of the green paint and also to smooth out the wood filler


Then I dry brushed a layer of "Beach White" by Behr. This is leftover paint from my kitchen cabinets and trim work in the living and dining areas.


After letting the paint dry for 24 hours, I came at it with some sand paper to allow some of the green to peek through from beneath the white and I used Weldbond glue to adhere some little pecten shells to the knobs.


Here's the finished table in my living room

And this is what happens when I start playing around with pretty stuff

Read more...

Blog template by simplyfabulousbloggertemplates.com

Back to TOP